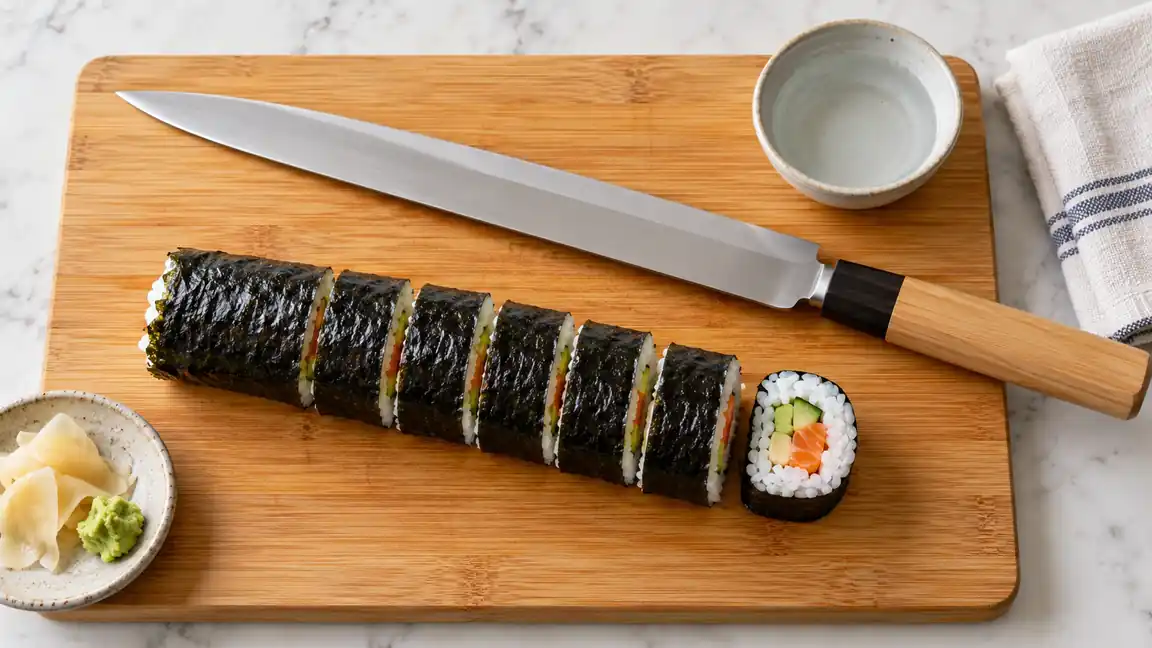
To cut sushi rolls cleanly, place the finished roll seam-side down, use a sharp knife with a long plain edge, and slice with a smooth drawing motion. Lightly dampen the blade and wipe away rice after each cut. Avoid pressing straight down, since excess pressure can flatten the roll and push the filling out.
The same basic method works for maki, futomaki, and inside-out rolls, although soft fillings and rice on the outside may require extra support.
If your blade cannot complete a smooth drawing cut, these knives for slicing sushi rolls offer useful points of comparison. A clean edge and controlled motion still matter more than a special label.
What You Need
- A sharp, plain-edge knife: A long slicing knife, sujihiki, gyuto, chef’s knife, or santoku can work. A longer blade makes it easier to complete each slice in one controlled motion.
- A stable cutting board: Wood, plastic, or a suitable rubber board provides a safer surface than glass, stone, or a plate.
- A clean, damp towel: Use it to remove sticky rice and filling residue from the blade.
- A small container of clean water: This allows you to dampen the blade lightly before cutting.
- Plastic wrap, if needed: It can support delicate inside-out rolls during slicing.
A specialized sushi knife is unnecessary for home preparation. Sharpness, suitable blade length, and controlled technique matter more than the knife’s label. A yanagiba is traditionally associated with slicing fish, but its single-bevel geometry and sharpening requirements make it less straightforward for cooks who are unfamiliar with that knife style.
How to Cut Sushi Rolls Step by Step
-
Finish shaping the roll. Compress it gently with the bamboo mat so the rice and filling hold together. Remove the mat before cutting. The roll should feel firm enough to move without splitting, but excessive compression can crush soft ingredients.
-
Place the roll seam-side down. This position helps keep the nori closed while you cut. If the seam begins to lift, dab a small amount of water along the edge and press it closed.
-
Clean and lightly dampen the knife. Wipe the blade with a clean damp towel, or dip the blade in water and wipe off the excess. The surface should be slightly damp rather than dripping wet. Moisture helps reduce rice sticking to the blade.
-
Trim the ends if desired. The ends may be uneven or have exposed filling. Slice off a thin piece from each end for a more uniform presentation. This step is optional.
-
Cut the roll in half. Set the heel or middle portion of the blade on the roll and draw the knife through in one smooth stroke. Use only as much downward pressure as needed. Let the sharp edge perform the cut.
-
Position the two halves together. Place them side by side with their cut ends aligned. This makes it easier to produce pieces of similar width.
-
Divide the halves into equal pieces. For eight pieces, cut both halves in half, then cut those sections in half again. For six pieces, divide each original half into three approximately equal sections.
-
Wipe the blade between cuts. Rice starch, avocado, cream cheese, and sauces can build up quickly. A clean blade passes through the roll with less drag and leaves neater edges.
-
Transfer the pieces carefully. Use the flat side of the knife or clean hands to move them. Keep fingers away from the cutting edge and avoid scraping the edge sideways across the board.
Use a Drawing Cut Instead of Pressing Straight Down
A sushi roll contains layers with different textures. The nori may resist the edge, while rice and fillings compress easily. Pushing the knife vertically through all those layers can squash the roll before the nori separates.
A drawing cut moves the edge forward or backward as it travels downward. This concentrates cutting action along a smaller section of the edge and requires less force. Start with part of the blade resting lightly on the roll, then draw it through while applying gentle downward pressure.
Try to complete the slice in one long motion. If the blade is too short, use two deliberate strokes rather than rapid sawing. Repeated short strokes tend to tear the nori and pull rice from the surface.
How to Keep the Roll From Falling Apart
Do Not Overfill It
An overfilled roll is difficult to close and may burst as soon as the knife applies pressure. Leave enough uncovered nori at the closing edge to form a secure seam. Arrange fillings in a compact line rather than spreading them across the entire sheet.
Use Rice With the Right Texture
Sushi rice should be cohesive without being mashed into a paste. Rice that is very dry may crumble, while overly wet rice can stick heavily to the knife and distort the roll. Spread it gently and avoid compressing individual grains more than necessary.
Keep the Seam Underneath
The board supports the seam when it faces downward. Cutting with the seam on top makes it easier for the nori flap to catch on the blade and peel open.
Support Delicate Inside-Out Rolls
Rice on the outside is more likely to stick to the knife or break away. Place a sheet of food-safe plastic wrap over the roll, shape it gently with the mat, and cut through the wrap and roll together. Remove every piece of plastic before serving.
Another option is to leave the plastic wrap around the roll while making all the cuts, then unwrap each portion carefully. Keep the wrap smooth so folds do not become trapped between the pieces.
Choosing a Knife for Sushi Rolls
The knife should have a sharp, clean edge and enough blade length to move through the roll without aggressive sawing. Several common knife styles can handle the task:
Names such as gyuto and yanagiba describe different shapes and roles. The overview of Japanese kitchen-knife types keeps those distinctions separate from cutting finished rolls.
A suitable gyuto knife can provide a plain edge for a controlled drawing cut; check the actual length and profile rather than relying on the category alone.
- Slicing knife or sujihiki: The long, relatively narrow blade supports smooth drawing cuts.
- Chef’s knife or gyuto: A sharp example offers sufficient length and versatility for preparing fillings and portioning rolls.
- Santoku: Its flatter edge profile can produce controlled slices, though shorter models may require more than one stroke through a large roll.
- Utility knife: It can cut smaller rolls if it has a sharp plain edge and enough length for a steady stroke.
A serrated knife is usually a poor choice. Its teeth can snag the nori, disturb the rice, and leave rough edges. A dull plain-edge knife presents a similar problem because it requires greater pressure.
Blade steel, manufacturing method, and decorative finishes do not determine whether a knife will make clean sushi cuts. The condition of the edge, blade geometry, cutting motion, and roll construction have a more direct effect.
Why Sushi Rice Sticks to the Knife
Sushi rice contains surface starch that readily adheres to a dry blade. A thin film of water reduces that contact, while frequent wiping prevents starch from accumulating.
Do not leave the knife submerged in water. Prolonged moisture can affect some blade and handle materials, and carbon steel is especially sensitive to corrosion. Lightly dampen the blade for cutting, then wash and dry it promptly after use.
If the knife still sticks badly, check these factors:
- The blade may need cleaning after every slice rather than every few slices.
- The rice may be overly wet or heavily compressed.
- The edge may be too dull to separate the nori cleanly.
- Sticky fillings may be coating the blade and increasing drag.
How Wide Should Sushi Pieces Be?
Piece width depends on the roll’s diameter and the desired serving size. Equal portions matter more than following one fixed measurement. Six pieces create wider portions, while eight pieces produce narrower portions from the same roll.
Cutting by repeated halves is the easiest way to make eight consistent pieces. For six pieces, cut the full roll in half and visually divide each half into thirds. Marking the positions lightly with the knife tip can help, but do not puncture or drag across the nori.
Safe Cutting and Cleanup
Set the cutting board on a dry, stable counter. If it slides, place a damp kitchen towel or a nonslip mat beneath it. Stabilize the roll with curled fingertips positioned well away from the blade’s path. Keep the guiding hand relaxed so it does not squeeze filling from the roll.
Never try to catch a falling knife or wipe the blade by pinching the edge. Fold the damp towel around the sides of the blade while keeping the cutting edge directed away from your fingers.
After cutting, wash the knife according to its manufacturer’s care instructions and dry it promptly. Do not leave it hidden in a sink beneath dishes. If the roll contains raw fish, clean the knife, board, towels, and preparation area carefully to limit cross-contamination. Keep perishable ingredients appropriately chilled before preparation and refrigerate finished rolls if they will not be served promptly.
Quick Fixes for Uneven or Crushed Pieces
- The roll flattens during cutting: Use less downward pressure, sharpen the knife as appropriate for its edge, and switch to a longer drawing stroke.
- The nori tears instead of slicing: Clean the blade, check its sharpness, and avoid rapid back-and-forth sawing.
- Fillings slide out: Reduce the amount of filling, shape the roll more evenly, and support it without squeezing as you cut.
- Rice collects on the blade: Dampen and wipe the knife after every cut.
- Pieces vary in width: Cut the roll in half first, align the sections, and divide matching sections together.
- Inside-out rolls lose their coating: Use plastic wrap for support and remove it fully before serving.
Clean sushi slices depend on three fundamentals: a sharp plain-edge knife, a smooth drawing cut, and a blade that is wiped and lightly dampened between slices. Shape the roll firmly, keep its seam against the board, and divide it systematically for neat, even portions.
