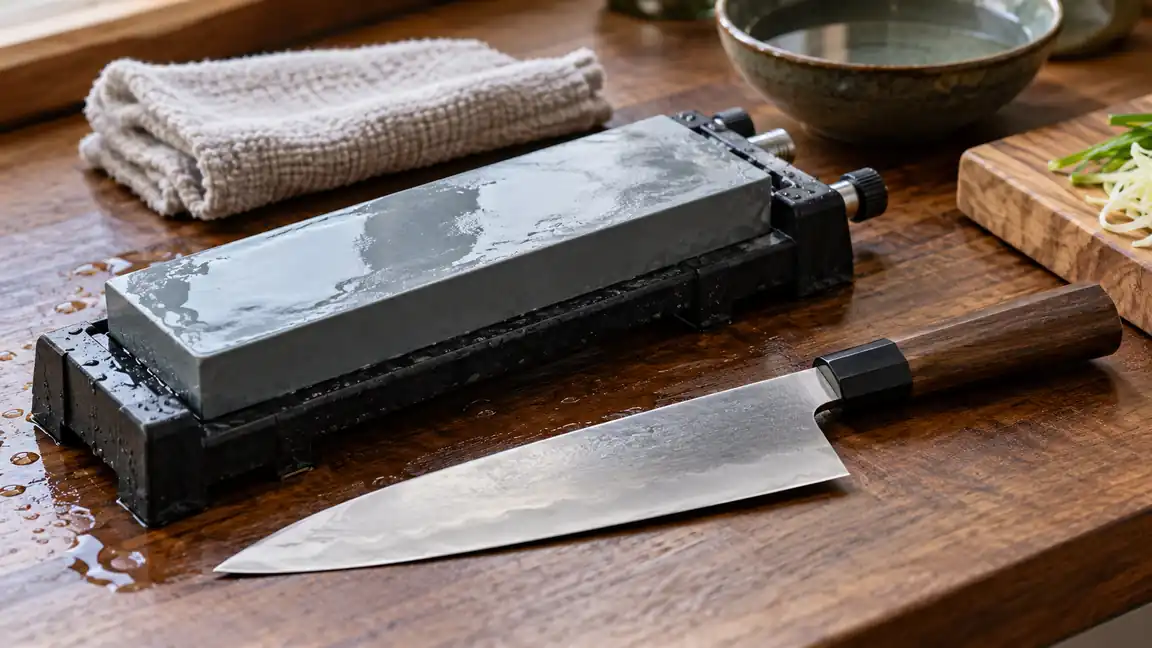
Japanese knives are usually sharpened with a whetstone or another abrasive system that matches the blade’s edge geometry. Before starting, determine whether the knife has a double-bevel, asymmetrical double-bevel, or traditional single-bevel edge. Then follow the manufacturer’s angle guidance, use the least aggressive stone needed, raise and remove a small burr, and clean the knife thoroughly.
A whetstone offers the control needed for thin edges and specialized grinds, but the correct technique differs by knife. A gyuto, santoku, or nakiri commonly has a double-bevel edge, while traditional yanagiba, deba, and usuba knives are often single-bevel. These patterns have exceptions, so inspect the blade rather than relying solely on its category.
Before choosing equipment, identify the blade’s edge geometry. Our sharpening options for Japanese knives guide helps compare systems, but the maker’s instructions remain the starting point for angle and compatibility.
Identify the Edge Before Sharpening
The edge configuration determines how the knife should contact the stone. Sharpening both sides identically can alter the geometry of a single-bevel or asymmetrical knife.
| Edge Type | How It Usually Looks | Basic Sharpening Approach |
|---|---|---|
| Symmetrical double bevel | Visible edge bevels of similar width on both sides | Sharpen both sides at the intended angle, using similar amounts of work |
| Asymmetrical double bevel | Edge bevels may have different widths or angles | Preserve the existing asymmetry unless the manufacturer specifies another geometry |
| Traditional single bevel | A wide bevel on one face and a nearly flat or slightly concave back face | Sharpen the wide bevel, then use limited flat contact on the back to remove the burr |
Do not assume a knife is single-bevel because it is Japanese or Japanese-style. Many widely used Japanese kitchen knives are double-bevel. A blade may also have a primary grind that appears asymmetrical while the small cutting-edge bevel is less visibly so. If the geometry remains uncertain, check the maker’s documentation or consult a sharpener familiar with Japanese knives.
Equipment and Work-Area Preparation
For routine sharpening, gather:
Stable support is part of preparation. Compare whetstone holders by their usable dimensions and how they secure the actual stone.
- An appropriate whetstone or compatible guided abrasive system
- A stable stone holder or damp, nonslip base
- Water or another lubricant specified by the abrasive manufacturer
- A towel for controlling moisture
- A flattening tool if the stone requires periodic flattening
- A soft cloth and mild dish soap for cleanup
A medium-grit water stone is commonly used to restore an ordinarily dull edge. A coarse stone removes material faster and is better reserved for significant dullness, chips, or geometry correction. A finer stone refines an edge after sharpening but cannot efficiently repair serious wear.
Grit numbers are approximate categories because Japanese Industrial Standards, FEPA, ANSI, and manufacturer-specific scales are not directly interchangeable. A stone labeled near 1000 grit in a Japanese-style system is a common starting point for routine sharpening. Lower numbers generally cut more aggressively, while higher numbers create a more refined finish.
Read the stone instructions before adding water. Some water stones need soaking, while splash-and-go stones require only surface water. Oil should not be applied to a water stone unless its manufacturer specifically allows it.
Place the stone where it cannot slide. Keep the cutting edge pointed away from nearby fingers and clear the area of dishes, cords, and loose utensils. The stone surface should be flat enough to support consistent contact. A dished surface can round the bevel or produce an uneven edge.
How to Sharpen a Double-Bevel Japanese Knife
-
Inspect and clean the knife.
Wash away food residue and dry the handle. Examine the edge under good lighting. Look for chips, bends, or sections that reflect light. Large chips, cracks, and significant deformation may call for professional repair rather than routine sharpening.
-
Prepare and secure the stone.
Soak or wet it according to its instructions. Place it on a stable holder or nonslip surface. Keep a thin film of water on a water stone while working, but do not flood the surrounding counter.
-
Set the sharpening angle.
Use the knife manufacturer’s specified angle when available. Angles are normally stated per side, so 15° per side produces a 30° inclusive edge. If no specification is available, preserve the existing bevel instead of selecting an arbitrary number.
To register the existing bevel, place the blade nearly flat on the stone and slowly raise the spine until the edge bevel appears to sit flush. Some users color the small bevel with a removable marker. A few light strokes reveal whether the abrasive is reaching the shoulder, the edge, or the full bevel. Clean away the marking afterward.
-
Sharpen the first side.
Hold the handle securely and place the fingers of the other hand on the blade face, safely above the edge. Apply controlled pressure over the section touching the stone. Move the blade so the entire edge, from heel to tip, receives contact.
The stroke direction can vary. Edge-leading, edge-trailing, and back-and-forth methods can work when performed with control. Avoid pressing so hard that the blade flexes or the angle changes. Use slower, lighter strokes near a thin tip.
-
Check for a burr.
A burr is a narrow lip of metal that bends to the side opposite the stone. Work in sections until a small, continuous burr has formed from heel to tip. Check by moving a fingertip gently from the blade face toward the edge, never along the edge. A cotton swab can also help reveal a burr, though loose fibers must be kept away from the cutting path.
-
Sharpen the second side.
Turn the knife over, establish the intended angle, and repeat the process until the burr moves back across the full edge. For a symmetrical edge, aim for comparable work on both sides. For an asymmetrical double bevel, follow the documented geometry rather than automatically using equal strokes.
-
Reduce and remove the burr.
Use progressively lighter pressure and alternate sides more frequently. Finish with very light strokes. A finer stone may refine the apex and help remove the remaining burr, but moving to a finer grit before both bevels meet at the edge can leave the knife dull.
-
Clean and assess the edge.
Wash the blade carefully with mild soap and water, then dry it immediately. Cut a sheet of paper held away from the body, or slice a tomato or other appropriate food on a stable cutting board. The edge should cut cleanly without snagging. Never test sharpness by sliding a finger along the edge.
Handling the Curved Tip
A curved edge requires a slight adjustment as the tip crosses the stone. Raise the handle enough to keep the bevel in contact while following the curve. Do not lift the spine sharply, which can create a wider, blunter bevel at the tip. Short, controlled strokes make this section easier to manage.
How Single-Bevel Sharpening Differs
Traditional single-bevel knives need a different method. The front face commonly has a broad bevel, while the back may include a shallow concavity called the ura. The narrow flat perimeter around that hollow helps form the cutting edge. Excessive grinding on the back can alter this geometry.
-
Confirm the knife is truly single-bevel.
Look for a broad primary bevel on one face and a nearly flat or concave back. Handedness may matter because right-handed and left-handed versions place the geometry on opposite sides.
-
Register the broad bevel on the stone.
Place the bevel face against a flat stone. Some traditional knives use a slightly convex bevel rather than a single flat plane, so manufacturer or maker instructions should guide how pressure is distributed.
-
Sharpen the bevel face.
Work along the full edge with controlled pressure. Keep the intended bevel shape rather than creating a narrow secondary bevel unless the knife was made with one or the maker recommends it.
-
Remove the burr from the back.
Place the back face flat against a fine, flat stone and use a limited number of light strokes. Do not raise the spine as though sharpening a conventional second bevel. This back-side process is often called uraoshi.
-
Repeat with lighter pressure as needed.
Alternate carefully between the bevel face and limited back-side work until the burr is gone and the edge is clean.
Single-bevel geometry can be difficult to restore after uneven sharpening. A valuable yanagiba, deba, usuba, or another specialized blade may be better handled by a sharpener experienced with that construction, especially if the bevel is warped, heavily chipped, or uneven at the shinogi line.
Choosing a Suitable Grit Progression
The edge’s condition should determine the abrasive sequence. Starting too coarse removes more steel than necessary, while starting too fine can make sharpening slow and ineffective.
A compatible diamond surface is one abrasive option. Compare diamond sharpening stones by their intended use rather than treating the material name as universal compatibility.
- Coarse abrasive: Used for chips, severe dullness, or bevel correction. It requires careful control because it changes geometry quickly.
- Medium abrasive: Used for routine sharpening and establishing a fresh apex on a dull knife.
- Fine abrasive: Used to refine scratch patterns, reduce the burr, and produce a smoother edge after the bevels already meet.
A highly polished edge is not automatically the best edge for every task. Some kitchen work benefits from a degree of microscopic toothiness, particularly when cutting tomato skins or other slick surfaces. Edge finish should suit the knife, steel, and intended use.
Sharpening Angles and Edge Geometry
Japanese knives do not share one universal sharpening angle. Steel, heat treatment, blade thickness, intended food, and factory geometry all affect the suitable angle. A narrow angle can cut efficiently but may provide less support behind the edge. A wider angle generally adds support but increases cutting resistance.
A guide can assist a suitable setup, but it does not determine the knife’s correct angle. These sharpening angle guides need to be checked against the blade and process.
Follow documented manufacturer guidance where available. If the factory angle is unknown and the knife performed well before becoming dull, matching the existing bevel is usually safer than regrinding it to a popular numerical angle. An angle guide can help with consistency, but its result depends on blade width, spine position, and how the guide attaches.
Can Pull-Through or Electric Sharpeners Be Used?
Some fixed-angle systems are compatible with certain Japanese-style double-bevel knives, but compatibility cannot be assumed. The device must support the knife’s edge angle, blade thickness, steel, and bevel configuration. A slot intended for symmetrical double-bevel edges can damage or reshape a traditional single-bevel knife.
Pull-through carbide sharpeners can remove material aggressively and offer limited control over thin edges. Electric sharpeners also vary in abrasive type, angle, and supported blade geometry. Check the sharpener instructions and knife manufacturer’s care guidance before use. Never force a blade into a slot that is too narrow or incompatible with its shape.
Frequent Sharpening Problems
The Knife Feels Sharp in Some Areas but Dull in Others
The entire edge probably did not reach the abrasive, or a burr formed in only a few sections. Return to a medium stone and work systematically from heel to tip. A flat stone and consistent angle help prevent missed spots.
The Edge Becomes Sharp but Dulls Immediately
A remaining wire burr can feel sharp before bending or breaking away during use. Reduce pressure near the end, alternate sides, and deburr carefully. Rapid dulling can also result from edge damage, unsuitable geometry, hard cutting surfaces, or lateral twisting during cuts.
The Bevel Width Is Uneven
Uneven bevels may result from changing angles, inconsistent pressure, a dished stone, or variation in the knife’s grind. Flatten the stone as required and use controlled strokes. Do not remove large amounts of steel solely to make bevels look visually identical, especially on asymmetrical knives.
The Whetstone Stops Cutting Efficiently
The surface may be glazed, loaded with metal, or no longer flat. Clean or condition it using the manufacturer’s method. Flatten it with a compatible flattening tool when needed. A dark slurry on a water stone is usually a mixture of abrasive and removed metal, but stone behavior varies by formulation.
If contact becomes inconsistent, inspect the stone before changing the knife angle. The guide to checking and flattening a whetstone addresses surface wear.
Care After Sharpening
Rinse sharpening residue from the blade and handle, then dry the knife completely. Carbon steel needs prompt drying because moisture can encourage corrosion. Stainless steel is more resistant to staining, but it is not corrosion-proof.
Clean and dry the stone according to its instructions. Let a water stone dry fully in a well-ventilated location before storage. Avoid strong heat or prolonged direct sunlight, which may contribute to cracking in some stones.
Use the sharpened knife on an appropriate cutting board and avoid glass, stone, ceramic plates, frozen food, and hard bones unless the knife is specifically intended for such work. Store it in a block, sheath, drawer insert, or secure magnetic holder that protects the edge from contact with other utensils.
Sharpen again when cutting performance declines and ordinary edge maintenance no longer restores it. Removing steel on a fixed schedule is unnecessary. Correct identification of the edge, a flat abrasive, steady angle control, and light finishing strokes are the main elements of sharpening Japanese knives without needlessly changing their geometry.
