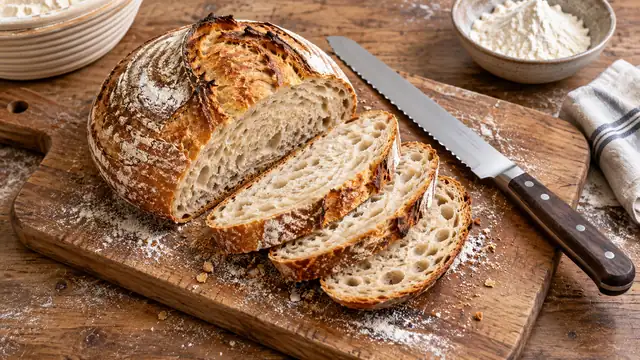
To cut sourdough bread cleanly, let the loaf cool completely, place it on a stable cutting board, and use a long serrated bread knife. Hold the loaf securely with your fingertips away from the cutting path, then use smooth back-and-forth strokes with light downward pressure. Let the serrations work through the crust rather than pressing hard enough to crush the crumb.
A crusty boule or batard can be more difficult to slice than soft sandwich bread. Its firm crust resists a straight-edged blade, while the open interior compresses easily. The right knife, a stable loaf, and a controlled sawing motion solve most cutting problems.
A blade that skids across the crust or compresses the crumb can make good technique harder. Our bread-knife comparison helps you check length and serration style before changing how you hold the loaf.
What You Need
- A serrated bread knife: A long blade can cross the loaf with fewer short, uneven strokes. Deep or moderately sized serrations help bite into a thick crust.
- A stable cutting board: Wood, plastic, or rubber boards provide a more suitable cutting surface than glass, stone, ceramic, or a countertop.
- A nonslip base: If the board moves, place a damp kitchen towel or a nonslip mat beneath it.
- A fully cooled loaf: Cooling allows the interior structure to set before slicing.
A sharp chef’s knife may cut a thin-crusted loaf, but it is usually a poor choice for a rustic sourdough crust. The blade can slip before it penetrates the surface, and extra downward force may flatten the bread. A serrated knife starts the cut more easily and requires less pressure.
For the board underneath the loaf, the end-grain and edge-grain comparison explains construction and care; either still needs a stable working position.
How to Cut Sourdough Bread Step by Step
-
Allow the loaf to cool.
Wait until the bread has cooled to room temperature. Cutting while it is still hot releases steam and can leave the exposed crumb gummy or compressed. A large loaf usually needs more cooling time than a baguette or small roll.
-
Stabilize the cutting board.
Set the board on a dry, level counter. Secure it with a damp towel or nonslip mat if it slides under light pressure.
-
Position the loaf securely.
Place the bread in its most stable natural position, usually with the baked bottom on the board. If the loaf rocks because of an uneven base, choose a position that gives you firm control without bringing your fingers near the blade.
-
Start at one end.
Place the serrated edge where you want the first slice. Cutting from an end creates a smaller exposed surface than splitting the loaf through the middle, which can help slow moisture loss during storage.
-
Make a shallow starting groove.
Use a few light strokes to break through the upper crust. Avoid pushing straight down. Once the serrations establish a groove, the knife is less likely to wander.
-
Saw through the loaf with long strokes.
Move the blade forward and backward while applying gentle downward pressure. Use as much of the blade length as practical. Keep the knife aligned vertically if you want slices of consistent thickness.
-
Finish through the bottom crust.
The base may be the hardest part of the loaf. Continue the same controlled sawing action rather than forcing the handle downward. Keep your supporting hand clear of the area where the blade will emerge.
-
Set the cut slice aside.
Do not pull the slice away until the knife has passed completely through the bottom crust. Tugging can tear the crumb or leave the slice attached along its base.
How to Hold the Loaf Safely
Place your supporting hand on the top or far side of the bread, away from the cutting line. Curl your fingertips slightly and maintain a secure but gentle hold. Excessive pressure can compress an airy crumb before the knife reaches it.
Keep the knife pointed across the board and away from your body. Never hold the loaf in the air, brace it against your torso, or cut toward your palm. If a rounded loaf rolls or rocks, stop and reposition it before continuing.
Loose bread crumbs can make the board or floor slippery. Sweep them away after cutting, taking care around the exposed blade. Wash the knife separately rather than leaving it hidden in a sink.
Cutting Different Sourdough Shapes
Round Boules
A boule can produce either full slices or smaller half slices. For full slices, begin at one edge and work across the loaf while keeping its flat bottom on the board.
For easier handling, cut the boule in half first. Place each half cut-side down, then slice downward through the crust. The broad, flat surface improves stability, though the resulting portions are half slices rather than full rounds. This method works well for toast, dipping, and smaller sandwiches.
Oval Batards
Start at one short end and cut across the width. Keep the blade perpendicular to the loaf for even slices. A slight diagonal angle creates longer slices, which can be useful for sandwiches or serving with toppings.
Baguettes and Narrow Loaves
Cut straight across for small rounds or diagonally for longer pieces. A narrow loaf is easier to stabilize, but it can still roll. Hold it gently from above and keep your fingertips behind the cutting line.
How to Keep the Crumb From Crushing
A flattened or torn interior usually results from excessive pressure, an unsuitable knife, or cutting before the loaf has cooled. These adjustments can improve the cut:
- Use longer sawing strokes rather than rapid, shallow movements.
- Reduce downward force and allow the serrations to engage the crust.
- Support the loaf without squeezing it.
- Make sure the bread knife is long enough to span most of the loaf.
- Replace or professionally sharpen the knife if it tears rather than slices. Sharpening serrations requires a method suited to their shape.
An open sourdough crumb contains irregular holes, so every slice may not look perfectly uniform. Thin slices are also more likely to tear around large air pockets. Cutting slightly thicker pieces often produces a more intact result.
Choosing Slice Thickness
The intended use should determine the thickness rather than a fixed measurement:
- Toast: Moderately thick slices hold their structure and accommodate an open crumb.
- Sandwiches: Cut thinner slices if the loaf has a dense, even interior. Use thicker slices when the crumb has large holes or the fillings are moist.
- Dipping or serving with soup: Thick slices or chunks are easier to handle.
- Crostini: Narrow loaves can be cut into relatively thin diagonal pieces, provided the crumb is firm enough to remain intact.
Use a steady visual reference as you cut. Looking at the lower edge of the previous slice can help prevent the knife from drifting and creating a wedge-shaped piece.
Why the Knife Tears or Skids
The Knife Is Dull
Serrated knives can become dull despite retaining a tooth-like appearance. A dull bread knife may scrape the crust, shed excessive crumbs, or require heavy pressure. Serrations need sharpening along their individual gullets with an appropriately shaped abrasive. An unsuitable flat sharpener can alter the serration pattern.
If the edge itself needs maintenance, follow the checks for sharpening serrated knives instead of using an ordinary straight-edge slot without confirming compatibility.
The Blade Is Too Short
A short utility knife may require cramped strokes that produce an uneven cut. It also places the hand closer to the loaf and cutting path. A bread knife long enough for the loaf permits smoother movement and better control.
An offset handle can provide additional clearance above the board. These offset bread knives offer a separate comparison of that layout.
The Loaf Is Still Warm
Warm bread has a softer, moist interior that can cling to the blade and compress. Allow the loaf to finish cooling before trying again.
The Crust Is Especially Hard
Begin with very light strokes until the teeth catch. Trying to punch through the crust can cause the blade to skid. Once a shallow groove forms, gradually lengthen the stroke.
Storing Sourdough After Cutting
Leave the remaining loaf in the largest piece practical. If it will be eaten soon, placing the cut face down on a clean board can limit exposure while helping the crust remain relatively crisp. Longer storage calls for wrapping or placing the bread in a suitable container, although enclosing it tightly can soften the crust.
For extended storage, slice the cooled loaf and freeze the pieces in a freezer-safe package. Separating slices before freezing lets you remove individual portions without thawing the entire loaf. Avoid refrigerating bread solely as a routine storage method, since refrigeration can accelerate staling in many breads.
Clean the bread knife after use according to its manufacturer’s care instructions. Hand washing and prompt drying are generally gentle on the edge and handle. Store the knife so its serrated edge cannot contact loose utensils or exposed hands.
A Clean Cut Depends on Control, Not Force
The most reliable method for cutting sourdough bread is to cool it fully, stabilize it on an appropriate board, and use a sharp serrated bread knife with long, gentle strokes. Start with a shallow groove, keep your supporting hand away from the blade, and saw through the bottom crust without pressing hard. This preserves the loaf’s structure while producing cleaner, more consistent slices.
